

Pom poms are little tufts of JOY! The humble pom pom will add colour, texture and whimsy to any craft piece. Making pom poms is a great excuse to use excess wool left from other projects and so its a cheap way to give your cushion covers, throws or other soft furnishings an update. I used oddments of grey, orange and pink to make pom poms of different sizes and arranged them in clusters around the perimeter of the cushion.
Pom poms are very easy to make, but can take some time if you want to make a lot. I bought the Multipom last year at a craft show and it has been amazing. You can create up to twenty small pom poms in one go and its a lot less fiddly than other devices I’ve used. It is great when making pom pom garlands, as you can easily make pom poms of the same size. I made a 6 metre garland last year for my Christmas tree in no time at all (well it took a while; but you know, a lot less than with a plastic or cardboard template!).
Materials:
- 3 x different coloured balls of wool or oddments
- Multipom pom pom maker
- Scissors
- Darning needle
- 2 pieces calico 49 x 49cm
- Matching thread
- Matching zip 51cm
- Cushion filler 46cm
- Zipper foot
- Disappearing ink fabric pen
Pom Pom Cushion: How To
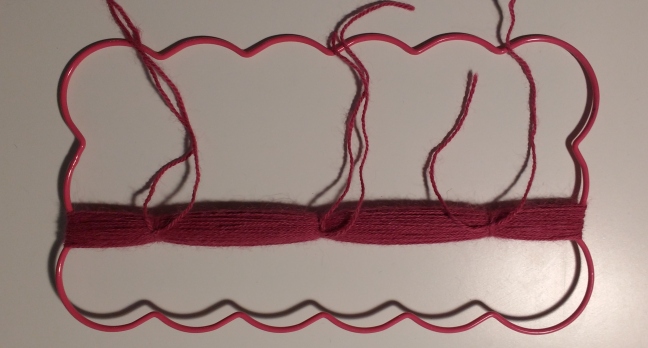
- Make the pom poms by wrapping wool around the metal frame. Tie a length of wool at the same intervals so that each pom pom will be the same size. You can create different sizes by wrapping more or less wool around the frame and by adding ties at smaller or larger intervals.
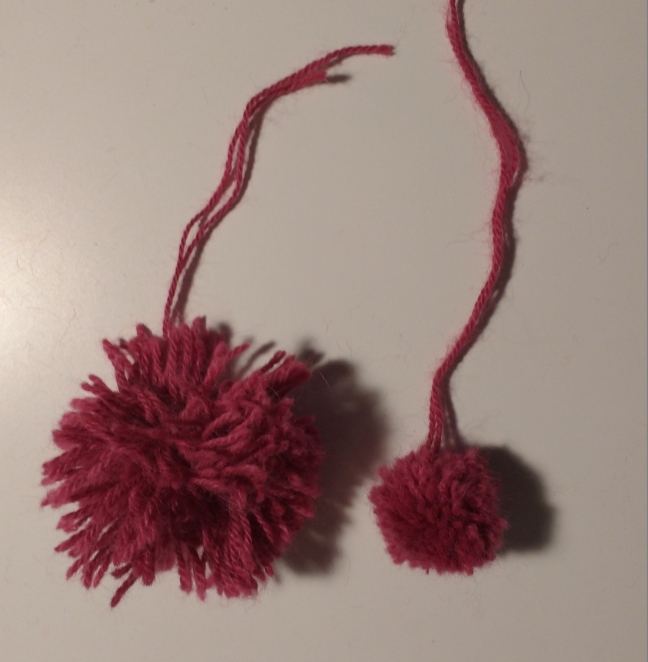
- Cut between the ties, then trim each pom pom down to the desired length. You may need to cut off quite a lot.
- Repeat with different coloured wools and make differently sized pom poms.
- Cut the calico to two 49 cm square pieces. This includes a 1.5 cm seam allowance.
- Mark nine dots around the perimeter of the square so that the pom poms will be evenly spaced when attached. (I originally was going to have a cluster of pom poms in the middle but decided against it).


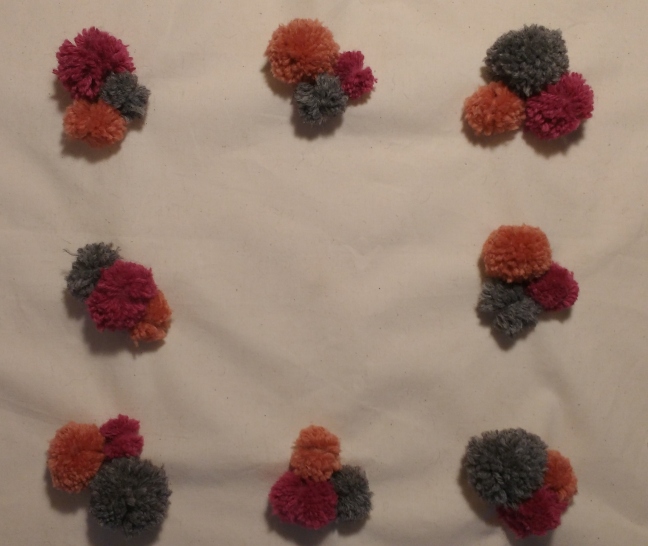
- Using a darning needle, pull the two threads of the pom pom through the calico. Tie a double knot on the other side. Repeat for three different coloured pom poms near each mark.
- Now its time to put the front and back together. Attach the zipper foot to your machine. Pin the open zipper face down on the right side of the back piece. I used a longer zip so that there is excess on each end.
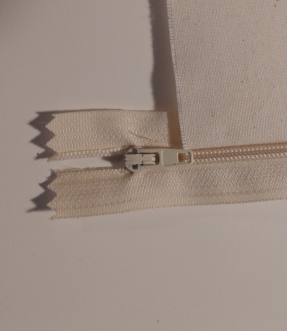
- Sew close to the teeth. At the half way point, stop and pull the zipper behind the foot so that its out of the way for the rest of the sewing.
- Attach the front of the cushion. Put right sides together and pin the other side of the zip in place. Repeat step 8.
- Keeping the right sides together, sew around the other three sides with a normal foot, leaving the zip open enough to turn the cushion the right way around again. Reverse over the ends of the zip a couple of times to reinforce, but avoid hitting the teeth with the needle.
- Trim the excess zip and cut the corners diagonally, avoiding snipping the stitching. This will reduce bulk and give the cushion crisp corners.
- Turn the right way around and insert the cushion filler and zip it up.


You can experiment with different pom pom sizes and coloured wools to make this project suit your tastes. Pom poms look sweet on patterned fabric too.
