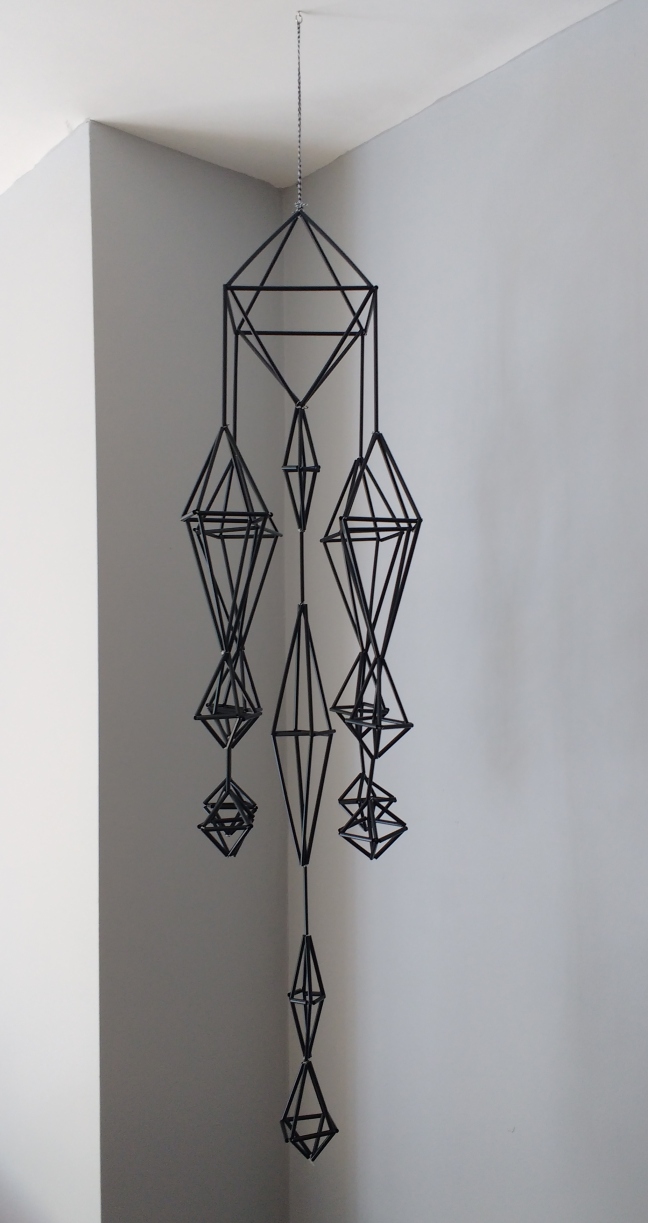
A himmeli is a traditional Finnish decoration made from fine pieces of straw. Usually they were made at Christmas time and were hung from the rafters until May Day to encourage a good harvest. I’ve seen these in so many houses in Finland. They are beautifully intricate and delicate and gently move with a current of air, casting shadows and shapes. My great grand aunt was an expert himmeli maker. I was thrilled when my granny found these photos of her with her work in the 80s. As you will see, my offering is a whole lot cruder and simpler. I really could have done with Aunt Tyyne’s nimble fingers!


I also found a great nugget in a guide about himmeli making from Seinäjoki’s Kalevala Women (I guess the Irish equivalent would be the Irish Country Women’s Association). This is my very rough translation:
“Himmeli-making was traditionally a pastime for youngsters, primarily girls, as part of Christmas preparations. In Hollola [Southern Finland], for example, in many households girls would gather on a Saturday night in the warm sauna to make himmelis, as the damp and heat had made the straw easier to manipulate by hand. Local young men began to join in with the task. Thusly, himmeli-making became a large part of village courting habits.”
There’s something quaintly romantic about this – heads bent in low light creating something together as you talk shyly to your suitor – pretty far removed from my generation’s courtship rituals of questionable Tinder dates and ‘Netflix and chill’ sessions. I can’t say it bares any resemblance to my usual Saturday night, but I will admit it was quite an enjoyable pastime for a Wednesday night in front of the TV.
Anyone who loves geometric designs, with a few hours to spare and an abundance of straws: this one is for you.
Materials
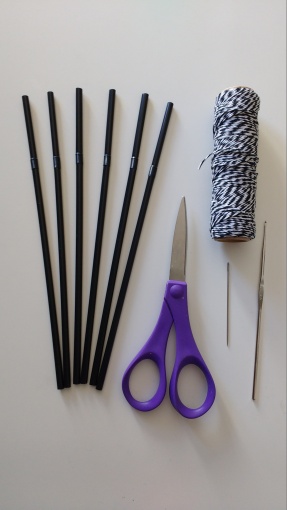
- Drinking straws
- Thread/String
- Scissors
- Needle
- Crochet hook
- Hook for hanging
Himmeli: How To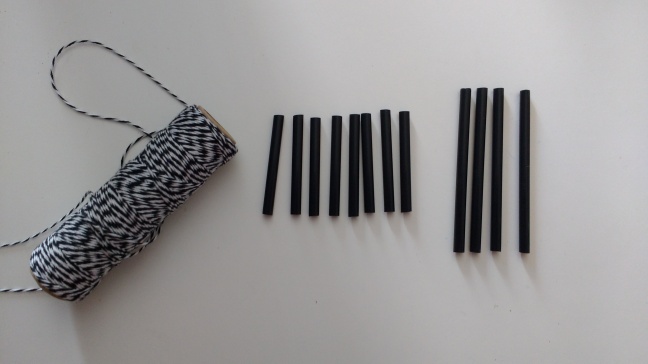
- Cut 8 short pieces of straw and 4 long pieces. The pieces used in this example are 4.5cm and 8cm.


- Thread a short piece, followed by two long pieces and then a short piece onto the string. Tie a knot and cut.
- Repeat and knot, this time leaving a long piece of thread on the needle. You now have two diamond shapes.
- Tie the bottom tips of the two shapes together with a separate short piece of string.


- Bring the long string back through one of the top short pieces of the shape and thread another short piece of straw onto the thread.
- Wrap the thread two or three times around the joint of the next shape. Repeat until you have a diamond shape.
- Bring the thread back up to the top and secure the two shapes together with a knot. Hide any loose threads by catching them with a crochet hook and pulling them inside the structure.


- Make one large diamond in the same manner for the rest of the diamonds to hang from. Decide upon the order of the shapes.
- Use the same method that you used to make each diamond to attach them all together. Thread the string through one diamond, wrap at next joint, and continue by bringing the thread through the next diamond. If you run out of string, tie on another piece.


Extra Tips
- Make sure all the pieces of straw are cut the same length so that the points meet properly.
- If your needle gets caught inside the straw (which can happen with longer pieces), ease it out with the use of the crochet hook.
- Use a thread the same colour as your straws for a neater look.
- Experiment with shapes – try putting smaller diamonds inside bigger ones.
- Use spray paint to make your himmeli match your decor.